At last, your new Black and Decker coffee maker is right before you. You’ve waited anxiously for this moment and it’s time to start brewing delicious coffee in a worthy machine.
Except for one thing: Unlike others, this coffee maker comes with a lot of buttons. How on earth do you use them to make the best possible brew? Sit back and read on. This article will explain how to program a Black and Decker coffee maker.
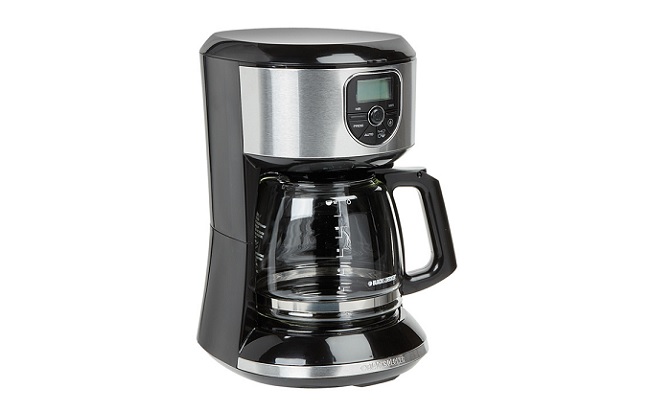
A Black and Decker coffee maker has a lot of controls. Simpler models have Program, Auto, On/Off, Hour, Minute buttons along with a screen that serves as a digital display. A more advanced model like the 12-cup version has Grind and Strong buttons included. Coffee beans go into the grinder and end up in the permanent filter in the device. The controls guide all of that.
Speaking of control, isn’t it ironic that a lot of things in life are beyond our influence? You have no power to determine what the weather will be tomorrow or what your future will be. Still, we all want a certain level of control over things that matter to us. No one likes to feel helpless. When chance or other forces influence the things that happen in our lives, there is no way to guarantee a great outcome.
The best way to ensure you don’t get the short end of the stick is to run the show. That way, you call the shots, and everything goes your way. The same thing applies to brewing coffee.
How to Program Your Black and Decker Coffee Maker Correctly
Coffee making is a delicate process. Things can easily go wrong. You can have the finest coffee but if your water is not hot enough or does not stay in contact with the coffee for long enough, the quality of your brew will be affected. You need to pull the strings in these areas and do it well.
Of course, your machine should be clean inside out and in good working condition. The newer it is the better your brew will be. Before you put water into your Black and Decker coffee maker here are some things to do:
1. Set the time
Everything happens in time, including making a cup of coffee. To start the process, you need to put your coffee maker in sync with the current time. Check the time on your wall clock, wristwatch or smartphone and set the time on your Black and Decker coffee maker to that time.
To do this, plug it into a power source and switch it on. The display on the unit should show 12 am at this point. Push and hold the hour button until it gets to your current time. Take note of the PM indicator on the screen. Next, push and hold the minute button until it gets to the time on your smartphone. The success of all other steps depends on you getting this first step right. So, take your time with it.
Think of what it would look like to arrive at a very important meeting too late or too early. Get there late and you could miss an opportunity of a lifetime. You’ll probably regret it for the rest of your life.
At the same time, if you were to arrive there too early, you might seem to be a desperate and idle person. This won’t be a good impression either. In life and brewing, getting the timing right is everything. That takes us to the next step.
2. Add water and coffee
Your machine shouldn’t stay empty any longer. The stage is set to put water and coffee in it. Put clean water in the reservoir and fill it up. It helps to warm up your carafe by also pouring hot water into it and letting it sit for some minutes. Throw out the water as soon as the carafe is hot. This simple action makes your brew as hot as possible since it won’t lose any heat to a cold carafe.
When you start the machine and the boiling water passes from the reservoir through the coffee and filter and finally into the carafe, it will meet an already hot container and so it won’t get colder trying to warm the carafe. You do want a hot cup of coffee, right? That’s how to get it.
Don’t forget to put your ground coffee into the filter. You will also need to shut the lid behind it properly. You don’t want to risk spiling coffee saturated with boiling water. If you’re using a model that has a grinder, put the coffee beans into the grinder instead of putting ground coffee into the filter. But there’s more you need to do.
3. Set the timer
No, it’s not a typo. This is the point where you set the timer to tell the device to start brewing coffee at a particular time of the day. The first step at the beginning was different. It was meant to put the machine in sync with the current time.
To set the timer, your device must still be on and set to the correct time of the day. Press the Program button and use the Hour button and Minute button to go to the exact time you want the machine to start brewing.
Some Black and Decker coffee maker models will show an indicator light next to the PM on the screen to display afternoon time and no light next to the same PM on the screen to indicate morning time. This should help you set the right time. After setting the timer, hit the AUTO button to activate your settings.
If you put whole coffee beans in the grinder, push the Grind button and select the setting that corresponds with the number of cups you want to brew. Some models also have a button that controls brew strength.
Remember, whatever time you choose, the device will start working at the specific time of the day and you’ll be on your way to getting the perfect cup of coffee.


