If you’re reading this article, then you’re looking for the best way to make coffee in a percolator and not end up with burned or bitter-tasting coffee. Well, you can sit back and enjoy the best tutorial on how to make coffee in a percolator in this piece.
Percolators have come a long way and are more reliable than ever. Though they have been taken over by newer and more advanced electrical appliances, you can still rely on a stovetop percolator to brew the perfect tasting coffee.
This guide will teach you everything you should know about percolators and how to make coffee in a percolator.
What is a Percolator?
In simple terms, a percolator is a kettle with a brewing system that draws and trickles hot water through ground coffee beans while brewing coffee. Percolators once held sway in the market so much so that electric and stovetop percolators became the real deal. However, with advancements in technology and the invention of automatic machines, the popularity of percolators decreased gradually.
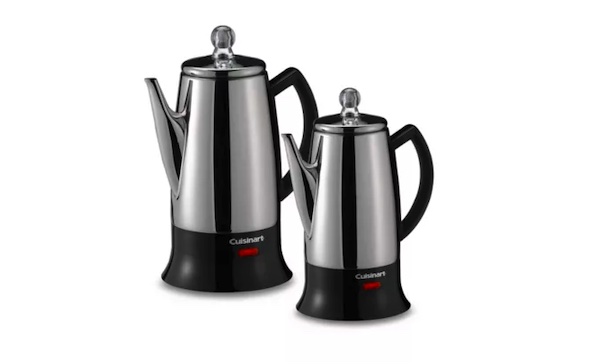
How Does a Percolator Work?
A percolator consists of several parts that do the work of brewing and ensuring you end up with a great-tasting coffee. The device features a main chamber connected with a tube or another chamber. The main chamber is placed inside a kettle which is where you place the grounded coffee.
The kettle is then filled with water which is heated to a certain temperature. The water then runs through the system and percolates coffee.
Another way to describe this is that the percolator uses the natural rise of bubbles created from heating the water to brew the coffee. This process continues in cycles. The steam will soak the ground coffee and the brewed coffee will drain back to the bottom. As the percolator re-circulates several times, it boosts the smell of the brewed coffee; however, this might also affect the taste but not in an unpleasant way. The coffee might come out too strong and bitter.
Fortunately, this only occurs with most newbie users. With the guide below and a little practice, you should be able to brew the perfect coffee using a percolator.
How to Make Coffee in a Percolator
Step 1: Grind and Measure Your Coffee
You can only use ground coffee beans in a percolator, but you need to ensure they are well-ground so that you end up with the best flavor. The best time to go about grinding your beans is to do so close to the brewing time. Also, use a burr grinder and ensure you don’t grind too coarsely.
For every 15g of coffee, you would have to use 250ml of water. You could vary the ratio as much as you want as you get used to the percolating process.
Step 2: Prep the Percolator
Start by adding cold water to the reservoir. If you prefer going for filtered water, then you can do that. After that, place the funnel filter on top and add the ground coffee to the basket, then press it down gently.
Step 3: Heat the Percolator
Unlike electric machines, percolators require heat from an external source to make coffee. Place the stovetop percolator on the burner and turn up the heat to medium-low. This should allow the water to heat slowly and prevent any bitter taste. If your percolator has a glass top, you can watch it carefully.
Look out for bubbles and when they begin to form, adjust the heat to maintain the temperature.
When the water begins to boil, if you see a steady stream of bubbles, it means the water is too hot. Also, if you don’t see any bubbles, it means the water is too cool. For the perfect brew, you should see one bubble every couple of seconds.
Step 4: Wait as It Percolates
While you might come across percolators with a set-it-and-forget-it option, it is important that you stay close during the entire process to ensure that the water temperature doesn’t fluctuate. You might end up with a bitter burnt-tasting coffee if you’re not careful.
You can go ahead to set a timer of 5 to 10 minutes. With percolators, the longer the appliance percolates, the stronger the coffee will be.
Step 5: Discard Used Grounds
Once you’re done brewing, you should avoid pouring the coffee straight into your mug. The first thing should be to discard the grounds or they can easily get into the coffee to affect the flavor and undo all your hard work.
Step 6: Serve the Coffee
Once you’ve gotten rid of the grounds, pour the coffee into your mug. You could add toppings like milk, sweeteners or cream to boost the taste.
Maintaining and Cleaning a Percolator
To keep your percolator’s performance at the highest levels, you will have to clean and maintain it properly.
Clean Right after Use
This is the most important cleaning tip and the easiest to overlook. Avoid leaving coffee grounds and coffee in the percolator overnight as they could stain the machine and affect the taste of brewed coffee. You should clean your percolator right after each use so that it lasts longer. Once you’re done serving the coffee, drain out the remaining coffee and check for any used grounds in the percolator.
Use of Soapy Water
You can make use of warm soapy water to ensure that all stains and dirt are removed. Place the percolator in a sink filled with warm water. Add 1 tablespoon of dish soap. Using a sponge to wipe the percolator. Check the basket and scrub up all stains due to grime or coffee residue. The ground basket is prone to dirt after several uses due to the oily coffee grounds. Wiping after every use will ensure it remains clean.
Also, pay attention to the stem which holds the basket in place. It can also become oily after several uses. Wipe it with the soapy sponge.
Rinse the percolator and all its parts once you’re done.
Deep Cleaning Methods
If you own a percolator and you’ve missed out on the steps above, there are chances that your percolator is extremely dirty and basic cleaning methods won’t work. You will have to use the deep cleaning methods below. They will clean stained or old percolators.
Baking Soda
- Pour some water into the percolator and add up to 3 tablespoons of baking soda
- Heat the mixture just the same way you would make coffee
- After it is heated, allow the percolator to cool and scrub with a soft cloth or sponge
Vinegar
- Mix the same amount of water and vinegar in a bowl
- Pour the mixture into your percolator and place it on the burner to heat up
- Once heated, take it off the heat and pour out the mixture
- Repeat the process again
- After that, fill the pot with some clean water and heat it to remove the smell of vinegar
- Inspect the pot for stains and if you find any, add some baking soda, water, and vinegar
- Heat the pot and wait till it starts bubbling
- Take it out of the heat and shake it slightly
- Pour out the mixture and rinse with clean water
Frequently Asked Questions
How do you know when percolator coffee is done?
When using a percolator to brew coffee, you would wait till the water in the pot starts bubbling. When that happens, turn down the heat and maintain the pressure for about 5 – 10 minutes. The longer you wait, the stronger the coffee would be. Five minutes is just fine if you’re not interested in strong coffee.
Should You Use a Filter With a Percolator?
Percolators do not require filters to work. The coffee grounds are held in a metal basket with holes, so you should be fine as long as you use a coarse grind. You could still use a filter and it would be of great help. The filter would make your coffee smoother and prevent the basket from stains.
What Temperature Should You Percolate Coffee?
The temperature for percolating coffee should be just below boiling point. This is why it is recommended to bring the heat to a medium-low setting. If the temperature reaches boiling point, it will end up burning the coffee and this will result in a bitter-tasting coffee. When percolating coffee, bring the temperature up slowly till it reaches a range of 195°F (91°C) – 205°F (96°C).


")